
Table of contents:
1. Finding your to-dos
2. Basic settings
3. Create To-dos
4. Work with To-dos
5. Tip
Finding your To-dos
Tasks can be managed from three areas depending on your workflow:
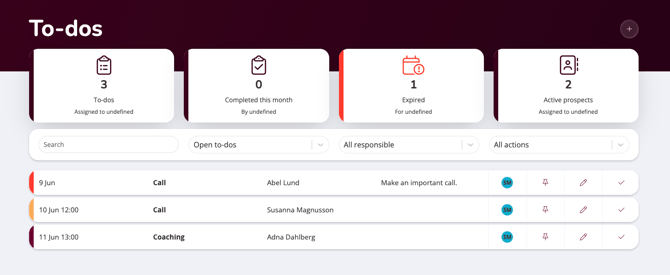
- The main menu: Navigate to To-dos in the main sidebar menu to access the central task management board. This dashboard displays total open tasks, tasks completed this month, expired deadlines, and active items.
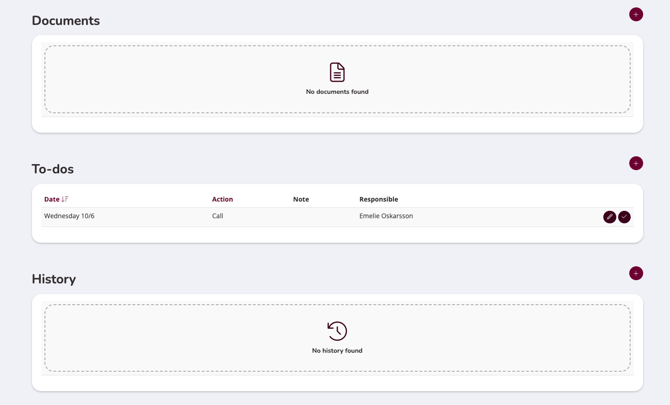
- The user profile: Open tasks that concern a specific individual or company can be viewed directly on their respective profile page.
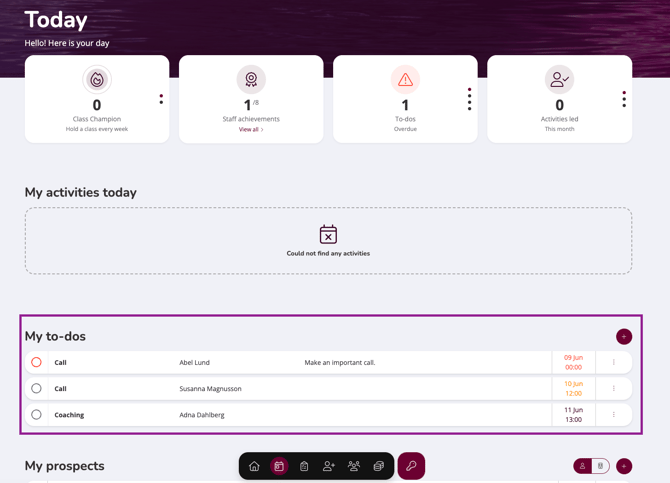
- The dashboard overview: For staff members and administrators, a summary of all tasks explicitly assigned to you is displayed on the Today tab within your main dashboard overview.
Basic settings
Before staff members can begin creating and assigning tasks, a system administrator must configure the global settings and define which user roles are permitted to take responsibility for them.
Note: Here we only describe the to-do functions. For information regarding tags, history and try it please read the article: Users: Members, leads and prospects
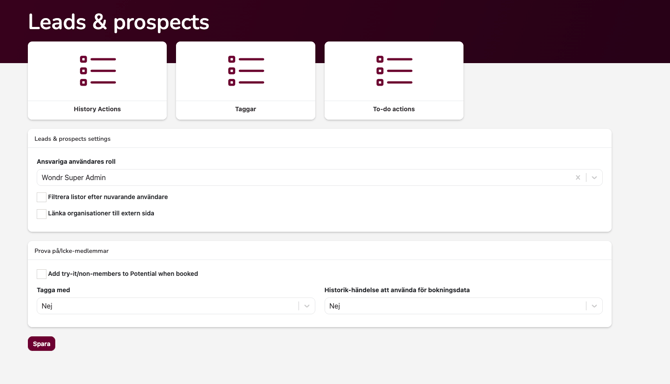
- Where to find it: Go to Settings > Leads & prospects.
- Role for responsible users: Here you select which role should be selected as the person in charge. If the role Staff is selected, all people who have the role Staff will be able to select as the person in charge. Select Administrator if instructors and reception staff should not have access to to-dos.
- To save changes: Click the Save button at the bottom of the section.
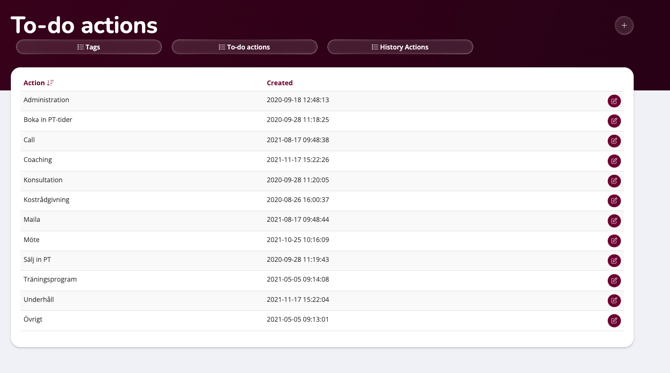
Then create different To-dos. Examples of these could be: Visit customer, call customer, clean gym, delete customer profile. If something new comes up, you can always add more To-dos.
Go to Settings > Leads & prospects > To-do actions.
Add new ones by tapping the plus icon in the right corner.
Work with To-dos
Now all settings are done and you can start working with to-dos. The feature is accessed via the menu, by clicking on To-do .
There are then three submenus, To-do, Company and People. The To-do submenu is used to create activities that need to be carried out. When a new activity is added, the following window appears: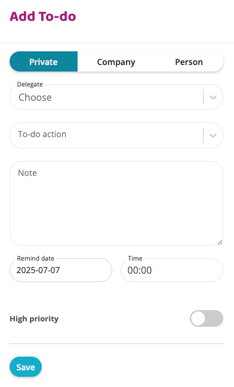
Type
If it is something you are going to do yourself, choose the type Private, if it is something that is going to be done in connection with a customer, choose either Company or Person.
Select which person/company this information applies to
Should this activity be assigned to another member of staff? Then select this person here to assign the activity to that person.
What to do? Select from your created activities
Custom text if more information needs to be added
Select the date you would like a reminder for this activity
Choose a time when you would like a reminder for this activity
Check to give this task a high priority which is visible in the list of tasks
The activity will now appear in the menu under To-do. Depending on when you set the reminder date, the activity will have a different color:
The date of the activity has passed
The activity should be carried out today
The activity should be carried out in the future
To the right of each activity are four icons:
Click this icon and this task will always be at the top of your list regardless of the reminder date.
Edit the task (assign to another person, edit the note, or change the reminder date).
- When you have an activity that is either overdue or needs to be handled, a notification in the form of a number will appear next to To-do in the menu. The number depends on how many To-dos you need to handle.
Last updated: 10/6-2026