
Watch or read
- The video and this article show exactly the same things, in the same order.
- The video is in English. This article is also available in other languages. To read it in your language, choose it in the language menu at the top of the help center.
- Each part below shows where it starts in the video, so you can follow along in both.
You don't need any earlier knowledge of Wondr. Nothing is saved until you click Create subscription at the end, so you can look around safely.
In this article
- Find Subscription types
- Name the membership
- Choose who can buy it
- Choose the period type
- Set the price
- Set binding and termination
- Customize the look
- Create the membership
1. Find Subscription types
Video 0:15
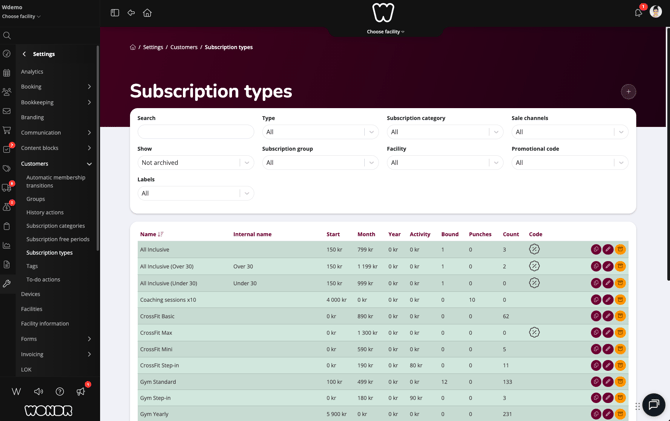
In Wondr, a membership is called a subscription. All memberships are listed on the Subscription types page.
Go to Settings > Customers > Subscription types. Here you see the memberships that already exist, with their prices.
Click + (Add subscription) in the top right corner to create a new one.
2. Name the membership
Video 0:35
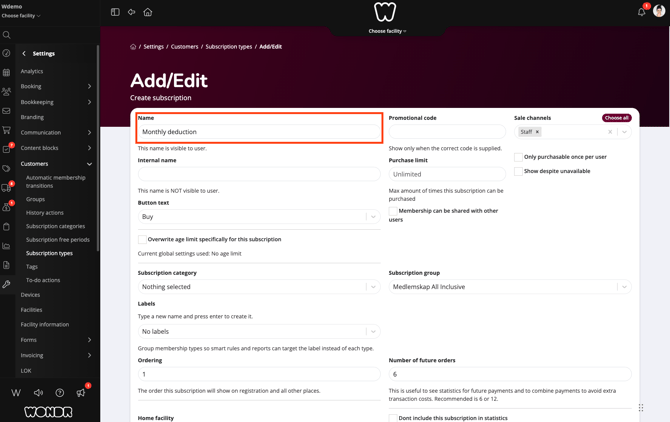
The page Add/Edit opens. This is where you set up the membership.
- Name is the name your members see, for example "Monthly deduction".
- Internal name is only for you and your staff. Members don't see it.
3. Choose who can buy it
Video 0:50
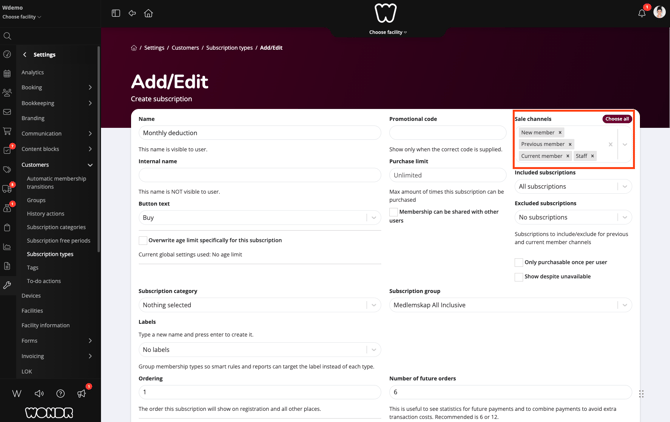
Under Sale channels, you choose who can buy the membership. There are four sale channels:
- Staff: your staff can sell it.
- New member: people who have never had a membership with you.
- Previous member: people who had a membership with you before.
- Current member: people who have a membership with you now.
When you choose Previous member or Current member, two more fields appear: Included subscriptions and Excluded subscriptions. Use them to decide which earlier or current memberships give access to this one.
TIP! Click Choose all to select all four sale channels at once.
4. Choose the period type
Video 2:00
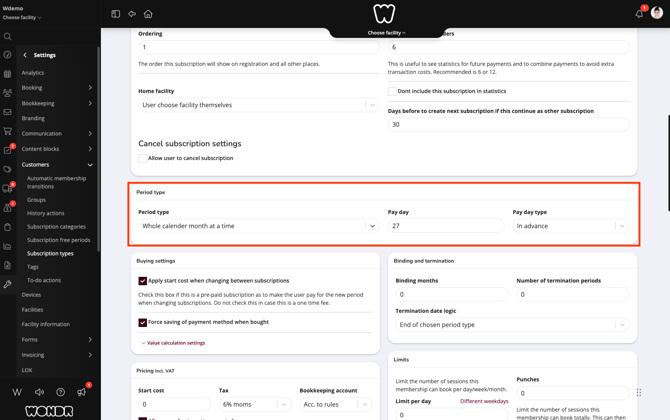
The Period type decides how long each period of the membership is. The member pays once per period.
- From date to date (one month at a time): each period is one month, counted from the day the membership starts.
- Number of days at a time: you choose the length in Period days, for example 14.
- Whole calendar month at a time: each period is a full calendar month. You also choose a Pay day (for example the 27th) and a Pay day type (for example In advance).
5. Set the price
Video 2:45
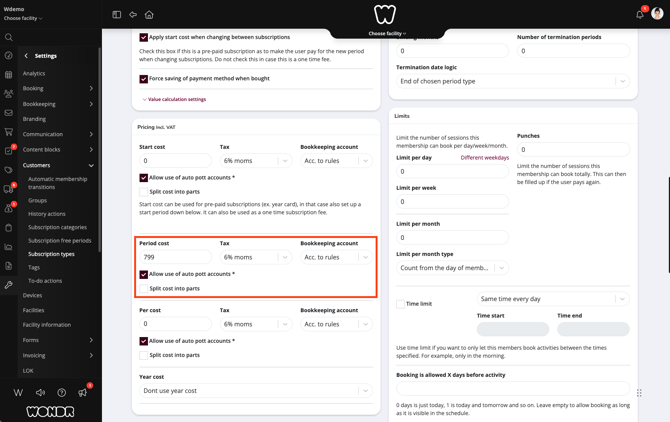
Under Pricing incl. VAT, you set what the membership costs.
- Start cost is paid once, when the member buys the membership. For example 150.
- Period cost is paid for each period. For example 799.
6. Set binding and termination
Video 2:55
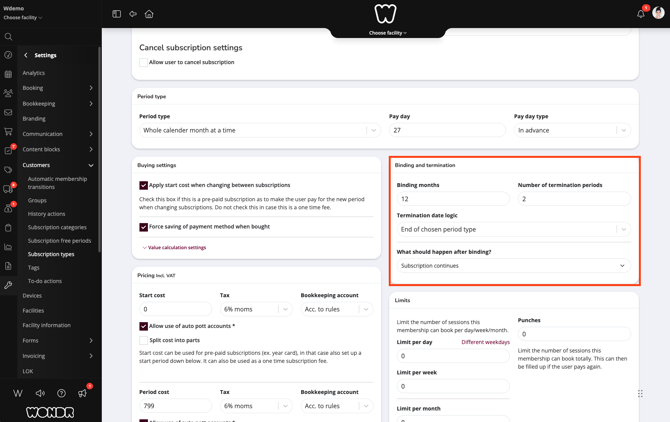
Under Binding and termination, you set how long the member must stay and what happens after that.
- Binding months: the number of months the member is bound to the membership, for example 12.
- Number of termination periods: how many periods the membership continues after the member cancels, for example 2.
- What should happen after binding?: for example Subscription continues.
NOTE: Set Binding months to 0 if the membership has no binding time.
7. Customize the look
Video 3:20
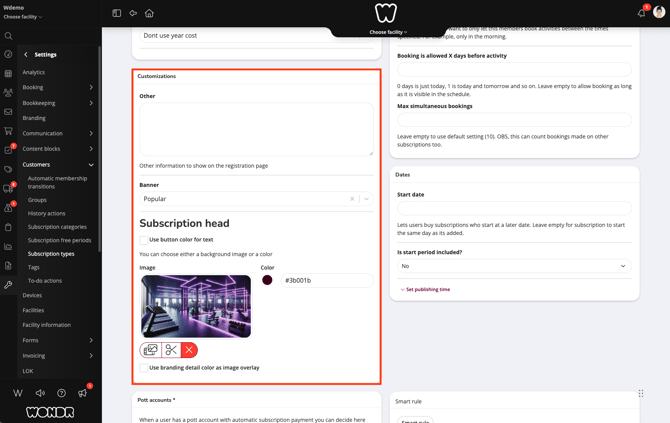
Under Customizations, you can change how the membership looks when people buy it. These settings are optional.
- Other: extra text to show on the registration page.
- Banner: a banner to show with the membership.
- Subscription head: a background image or a color for the top of the membership.
8. Create the membership
Video 3:30
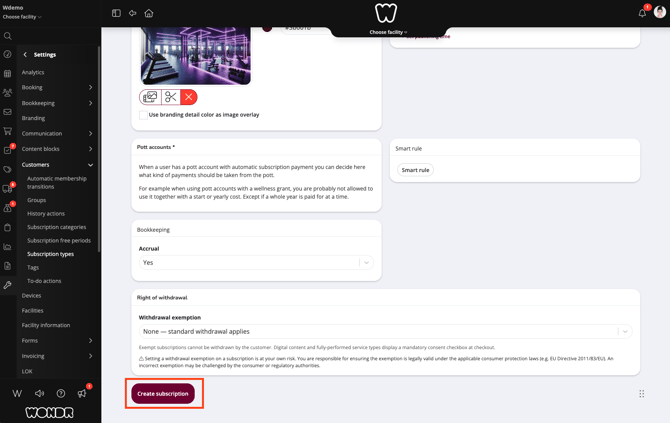
Scroll to the bottom of the page and click Create subscription. Your new membership now shows in the list on the Subscription types page.
NOTE: You only see the pages your role has access to. If you can't find Settings, ask your administrator.
Words you will see
Subscription
Wondr's word for a membership.
Subscription type
One kind of membership, with its own name, price and rules.
Sale channel
A group of people who can buy the membership, for example new members or staff.
Period
The time the member pays for at once, for example one month.
Binding
The minimum time a member must keep the membership.
Termination period
The time the membership continues after the member cancels.
What’s next?
-
Create your first punch card
The next video in the education series. Learn how to create a punch card. -
Create new subscription
A full help article with every setting explained.