Table of contents
1. General settings part 1
2. General settings part 2
3. General settings part 3
4. Period Types & Purchase Settings
5. Pricing
6. Binding and termination
7. Limits
8. Dates
9. Customizations
10. Smart rule
11. Assign passage groups
12. Bookkeeping
13. Related articles
14: Adding a withdrawal exemption
General settings part 1
Go to Settings > Customers > Subscription Types to create a new subscription.
Click the plus icon in the upper right corner to create a new subscription.
Below is a description of all the functions that are visible in the image (note that this is only part of a screen and that the rest of the screen with the remaining functions can be found further down in the flow).

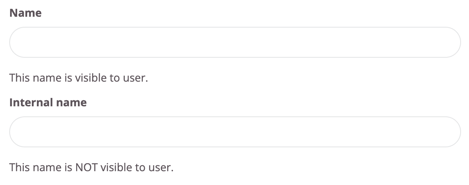
Name
Enter the name of the subscription (visible to customers on the website and in the app).
Internal name
Not visible to customers. Used if internal name for subscription is desired, can be left blank.
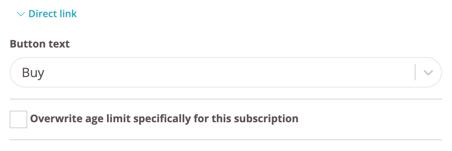
Direct link
Here you can find a direct link to the subscription if you wish to post it on your website, social media or send it to a user for easy registration.
Button text
Choose between a number of different options for what should be on the button when a customer selects/purchases the subscription online.
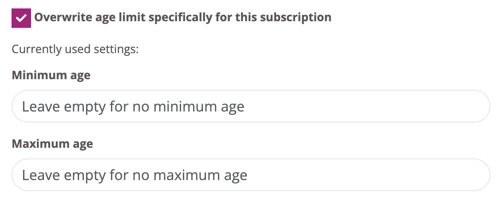
Overwrite age limit specifically for this subscription
If you're using age limits for subscriptions these settings can be overwritten here for this particular subscription.
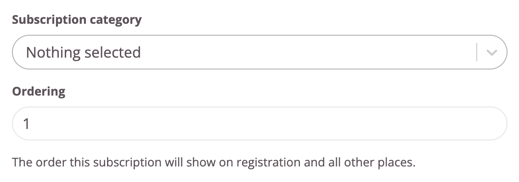
Subscription category
If subscriptions are sold via a website, they can be divided into different categories/menus to facilitate the purchasing process. Specify which category the subscription should be included in (it can be in several categories or none at all).
NOTE! This list is empty from the start, you must create the categories yourself. You do this via Settings>Customers>Subscription Categories.
Ordering
The number in this field determines the order in which the subscription is presented on the website. A 1 is displayed higher than a 2 in the list.
General settings part 2

Promotional code
Here a promotional code can be created if a subscription is to be hidden and only available for purchase by those who have the correct code. The subscription will only be visible on the website once the customer has entered the code.
Sales channels
This specifies how/where the subscription will be sold and who will be able to buy it. It is possible to choose multiple sales channels. Below is a description of what each sales channel entails.
Select all: Subscription is sold in all channels. To brand new customers via the website, via reception staff and can also be purchased by existing members in the app.
Staff: Through this sales channel, subscription can only be sold by staff and customers cannot purchase it on their own. It is therefore not visible to the outside world at all, only staff can see this subscription.
New members: Through this sales channel, subscription can only be purchased by new customers who have not previously had a subscription with you (in other words, it is only visible on the website and not via the app).
Previous members: Through this sales channel, subscription can only be purchased by people who have previously had a subscription with you. When you choose this sales channel, you can also choose which subscription they should have previously had in order to sign up for this subscription.
Current members: Only people with an existing and active subscription can purchase this subscription through this sales channel. When choosing this sales channel, you also get to choose which subscription they currently need to have in order to sign up for this subscription.
No sales channels: The subscription is not sold anywhere and is only found in the list of subscription types. In other words, it is archived. If it is to be reactivated, just add sales channels again.
Purchase limit
Specify how many people can hold this subscription at the same time.
Only purchasable once per user
If this box is checked, the subscription can only be purchased once per person. In other words, if it has already been active on a profile, it cannot be added again.
Show despite unavailable
Check this box to display the subscription on the website even if it is not available. Availability can be controlled by various things such as: hidden behind a promotional code, subscription limit reached or subscription publication date not yet. The select/buy box will now be grayed out and customers will not be able to click on the subscription but will still be able to see that it exists and is part of the offer.
Subscription can be shared with other users
Check this box if the subscription should be shared between different profiles. For example, if this subscription should be a clip card that can be shared.
Subscription group
If there are different subscription groups, for example personal training, you can link the subscription with the subscription group and control access to book different sessions in the schedule. Read the guide: Subscription groups to learn more.
Number of future orders
This setting only affects what the staff sees. The default setting of "6" is something we recommend that you keep in most cases. This function controls how many upcoming orders are previewed on the user's profile. When "6" is entered, the staff always sees future orders for the next six months. If you instead type "12" here, the staff will see a whole year ahead.
General settings part 3

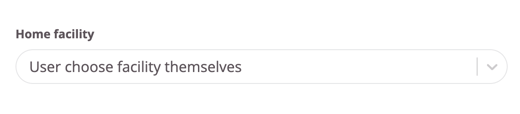
Home facility
Only for customers with multiple facilities! If there are multiple facilities, you decide here whether the customer should be assigned a facility automatically when purchasing this subscription or whether they should be allowed to choose the facility themselves.
Do not include this subscription in statistics
Click this box to exclude the subscription from all sales statistics. For example, if a staff subscription is being created.
Days before creating the next subscription if this one continues as another subscription
If a subscription change is scheduled on a customer's profile, this feature controls how close to the new subscription start date that orders begin to appear in the preview view on the customer profile.
Allow user to cancel subscription
This feature must first be activated under "Settings>Customers", after which it will be available here. Check the box if users should be able to end this subscription on their own without having to contact staff. Of course, the binding period must have expired!


Period type
This setting controls when the monthly subscription fee is charged.
NOTE: If monthly cost is not used, this setting does nothing.
From date to date (one month at a time)
The user pays for a full month at once and will always have the day the first purchase was made as the payment date (all users will then have different payment dates depending on when the subscription was purchased). Note that this only works if card payment is the selected payment method as it can be charged at any time. If AG is used as the payment method, all orders will be sent with the monthly file.
Number of days at a time
Choose this option if the subscription is to be charged every other week or every week, for example. In the box that appears "Number of days in period", the intervals for the charges are specified.
Whole calender month at a time
This option aggregates all active members' withdrawals to a specific day each month (usually the 27th) so everyone has the same payment day. The first time the customer signs up, they will pay a partial amount for the remaining days that month, then they will be charged for the entire upcoming month on the selected date.
Apply start cost when changing between subscriptions
- If the subscription only has a start cost (lump sum), the box should be checked.
- If the subscription uses the start cost as an administrative fee that is only payable once, the box should be unchecked.
Force saving of payment method when bought
Uncheck this box if it is not a requirement that a payment card be saved when purchasing.
For example, if the subscription is a one-time payment, this box can be unchecked. If it is a subscription with ongoing monthly payments, the box should remain checked.
Value calculation settings
When a subscription is assigned to a user, a value of the total revenue for the entire time the subscription is active is calculated using the settings below. The value is reported in the "Value" report.
Use start cost
Check this box if the start-up cost should be included in the total value of the subscription.
Use binding months times month cost
If a commitment period is used, this box can be checked and then the commitment period will be multiplied by the monthly cost to see the total value for the entire commitment period.
Number of months times month cost
If no commitment period is used, you can manually enter the average number of months a member stays with you and the value is then based on the number of months you enter multiplied by the monthly cost.
Number of years times year cost
If a recurring annual cost is used, enter here how many times it should be included in the total value. Again based on how long your members stay on average.
Pricing
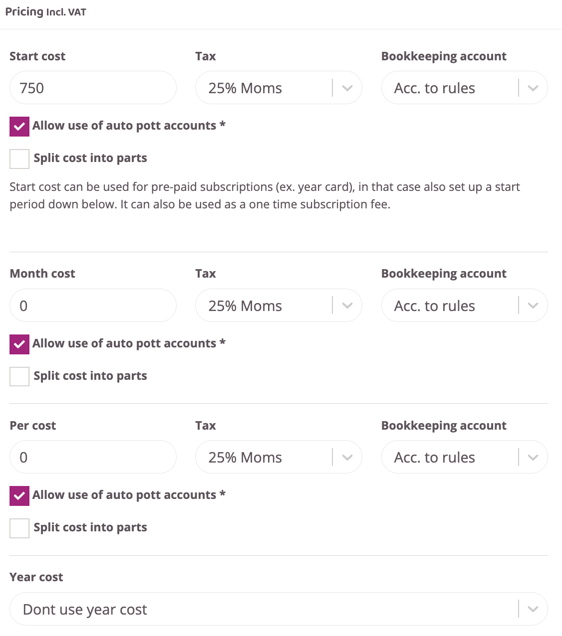
Start cost
The start cost is a lump sum that is charged once at the start of the subscription.
This cost can be used for itself. For example, if the subscription is to be an annual pass where the entire amount is charged directly. Then enter the entire amount here.
This cost can also be combined with, for example, a monthly cost as an administrative start-up fee.
Period cost
Enter the subscription fee here if it is to be charged on a monthly basis.
Per cost
Enter the cost to be paid per trained session. This cost is charged at check-in for the session. Can be a single cost but can also be combined with a running period cost.
Year/Annual cost
If the subscription is to have a recurring annual administrative cost, enter it here.
Allow use of auto pott accounts *
When a user has a pott account with automatic subscription withdrawal, you can choose here which types of payments should be withdrawn from the pott.
For example, when a pott account is used for fitness allowance, you may not use it to pay start-up costs or annual costs. Unless the cost is used to pay for the entire year's training at once.
Split cost into parts
Use this setting if the total includes multiple items that should have different VAT rates and be posted differently.
An example could be a Foodbox challenge. The customer pays a package price of 2000 SEK, where 1000 SEK is for the food and should be booked as 12% and 1000 SEK is the training at 6%. Then check this box and divide the cost into two lines with different VAT rates.
Tax (VAT)
Enter Tax for the cost (always preset to 6% and only needs to be changed if it is to be a different tax rate).
Bookkeeping account
If this subscription is to be posted differently than what is set in your posting rules, it can be manually overwritten here. If no setting is made, the rules set in the system will be followed.
Binding and termination

Binding months
This is where you enter the binding period for the subscription. If there is no binding period, leave the 0 as it is.
Number of termination periods
This is where you specify the notice period for the subscription. If there is no notice period, leave the 0 as it is.
Termination date logic
If a subscription automatically ends after the binding period, the logic is determined here.
End of chosen period type - Even if the commitment period expires in the middle of the month, the subscription will not end until the last day of that month
Exact date - The subscription ends on the same day the commitment period ends. The last order will be automatically edited so the member only pays up to the date the subscription ends.
What should happen after binding?
This option is only visible if a binding time is specified. This specifies what should happen when the binding time expires.
Subscription continues - Nothing happens, the subscription continues to be active and the draws continue.
Subscription changes to different one - The current subscription will be terminated and it will automatically switch to another one. This is indicated in a new box that appears when this option is selected.
Subscription terminates - Subscription ends and draws cease.
Limits
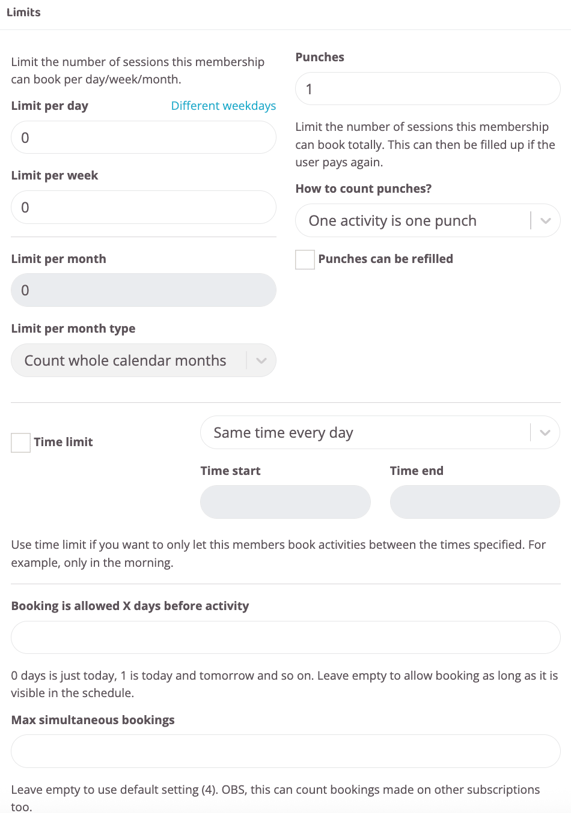
Punches
Used when posting a punch card. Enter the number of punches in this field. Remember to fill in the starting cost as the cost for the punch card itself. Please read article: Create a punch card
How to count punches?
This option only appears if the number of punches has been entered in the box above. There are three options here. Either one punch is counted as an activity, in other words, if a user is booked on two sessions on the same day, two punches will be deducted.
The second option is that one punch is one day. If this option is selected, the user will be able to book two sessions on the same day but will still only be charged one punch.
The third option is to count the hours in minutes. For example, if the punch card is to give 10 hours, enter 6000 in the Quantity box. Minutes are deducted for each booked activity depending on how long the booked activity is.Punches can be refilled
This option only appears if the number of punches has been entered in the box above. Should users be able to top up this punch card on their own? Then check this box.
Limit per day
If the subscription should have a limit on how many times per day users can train, it is set here. Either the limit is the same every day or you can click on "different days of the week" to have different limits for different days of the week.
Limit per week
If the subscription is to have a maximum limit for booked sessions per week, the maximum number is entered in this field. If a maximum limit is not to be used, the 0 should remain, in which case an unlimited number of sessions are included.
Limit per month
If the subscription should have a maximum limit for booked passes per month, the maximum number is entered in this field. This function is not activated from the start, if it is to be used, support needs to be contacted first.
Limit per month type
Count from the start of the subscription - If a monthly limit of, for example, 10 passes/month is used, the limit applies from the day the subscription is activated and the dates are reset each following month.
Count entire calendar months - If a monthly limit of, for example, 10 passes/month is used, the limit applies across entire calendar months and is reset at the end of the month regardless of when the subscription was first activated.
Time limit
Check this box if the subscription should be time-limited to, for example, lunch or evening hours. Fill in the start time and end time fields. It is between these times that the subscription is active for booking. Please read aritcle: Subscription with a time limit.
Booking is allowed X number of days before activity
Set how many days in advance this subscription can book an activity. Leave blank to control the default setting.
Max simultaneous bookings
Leave blank to use the default setting in the schedule (all users are allowed to have the same number of simultaneous bookings). If this is to be differentiated between subscriptions, specify how many bookings this subscription is allowed to have simultaneously.
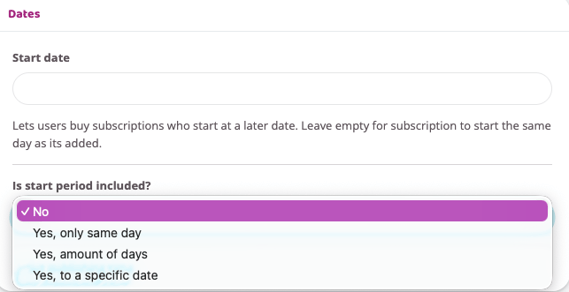
Dates

Start date
If the subscription should start at a later date but be available for purchase in advance, enter the date in this field. Leave it blank if the subscription should start on the same day it is purchased.
Note! If this feature is used for a subscription with a monthly fee, the customer will be charged for the first month immediately upon purchase (this ensures that they provide their card details so you don’t risk a failed payment). No further charges will occur until the second month, when the subscription becomes active.
Is a start period included?
Select “Yes” or “No” from the dropdown (a start period should only be used when ending or switching a subscription that has a start-up cost. If the subscription has a minimum term, ending or switching to another subscription should be managed via the binding period).
There are four options:
No – Default. Change this only if something should happen to the subscription after a certain period. If the subscription should simply continue until the customer cancels, leave it as “No.”
Yes, only same day – Choose this option if the subscription should only be valid for one day. Regardless of when the customer purchases it, it will expire at midnight that same day. This is a good option for trial subscriptions or day passes. No additional settings are required if you select this option.
Yes, number of days – Choose this option if the subscription should be valid for a specific number of days. For example, if a punch card should automatically expire 365 days after activation, even if there are remaining punches.
Yes, until a specific date – Choose this option if the subscription should end or switch to another on a specific date. For example, if you have a summer pass that should end on the last day of August.
If “Yes” was selected in the dropdown Is a start period included, continue filling in the fields below.
Amount of days
Number of days for starting period
What should happen after start period
Select one of the following options from the drop-down list "Subscription continues", "Subscription changes to a different one" or "Subscription ends"
Continue as subscription
Fill in this field if the subscription should continue as a different subscription after the initial period and select another existing subscription from the drop-down list.
Set publishing time
Specify the date the subscription should be published on the website. Specify the time and date for both publishing and unpublishing.
NOTE: Still requires correct sales channels to be visible.
Customizations
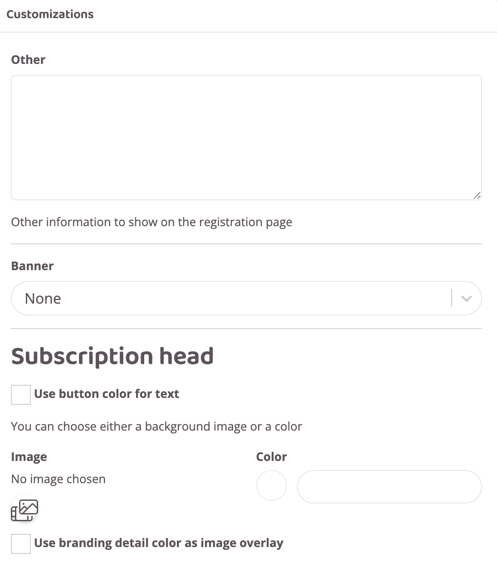
Other
Free text box for information that should be included about the subscription on the website and in the app.
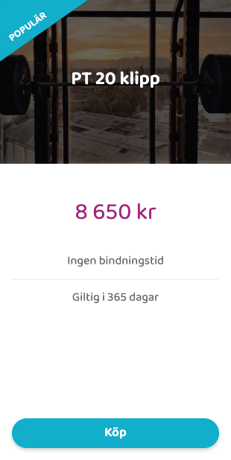
Banner
Choose whether there should be a small extra box at the top of the subscription with one of the following texts "Best value", "Offer" or "Popular". See image for example.

Subscription Head
Choose your own image or color for the subscription header. See example image below.
Use button color for text
The button color is set via "Settings>Branding". Check the box if the selected color should be used for the text in the subscription header and match the button at the bottom.
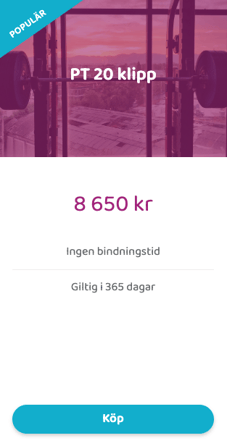
Use the branding detail color for the image overlay color
The detail color is set via "Settings>Branding". Check the box to have it as the overlay color in the subscription header. See example with overlay color below.
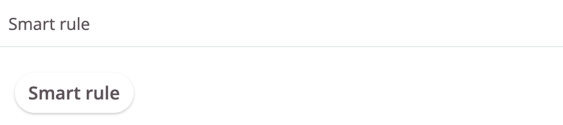
Smart rule
This box is only visible if you have the "Smart Rules" add-on module in your license. If you use smart rules, you can create a rule here that only applies to this subscription. Read more about smart rules in the category "Smart rules".
Assign passage groups
This box is only visible if you have an access system connected to your Wondr. This box specifies which door access this subscription should have.
Bookkeeping
Specify whether this subscription should be accrued in your accounting or not.
This article has explained all the features available for creating subscriptions. Read more to learn more about creating specific subscription types.
Adding a withdrawal exemption
In the section Right of withdrawal, you will find a dropdown menu titled Withdrawal exemption.
By default, this is set to None — standard withdrawal applies, which means the standard 14-day withdrawal window is active. If you offer a membership that qualifies for a legal exception—such as an online portal providing immediate access to digital home workout videos—you can choose from the built-in exemption categories:
- Digital content not on tangible medium: Use this for online videos, digital training programs, or app-based content (like an on-demand fitness streaming archive). Choosing this option displays a mandatory consent checkbox at checkout so the member explicitly acknowledges they lose their right of withdrawal once performance begins.
- Leisure activity / service with a specific scheduled date or period: Use this for fixed-schedule options like live group fitness courses, events, or training camps running on specific dates.
- Service fully performed: Use this when a service or membership benefit is fully delivered immediately with the member's express consent. This also displays a mandatory consent checkbox at checkout.


⚠️ Important legal notice on exemptions: Setting a withdrawal exemption on a subscription is at your own risk. You are responsible for ensuring the exemption is legally valid under the applicable consumer protection laws (e.g. EU Directive 2011/83/EU). An incorrect exemption may be challenged by the consumer or regulatory authorities.
Need more information?
If you want to read more about the initiative, legal requirements, and how to track member requests, you can check out our main master guide here: Managing the EU right of withdrawal ("withdrawal button") compliance.
Related articles
Last updated: 25/06-2026