Table of contents:
1. Create attributes
2. Create a product with multiple variations
3. Related articles
Intro
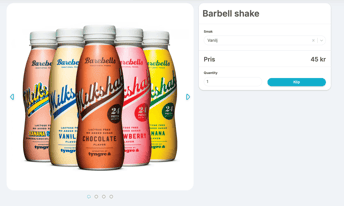
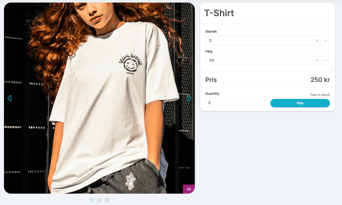
Using product variants and attributes, you can quickly and easily create a dynamic and beautiful webshop. Customers can choose the size, color, flavor, etc. of their products and browse through images linked to each product/attribute to get a picture of your range. See below for examples of how the webshop could look if you use these features.

Video example:
Create attributes
Attributes are what define the variations of a product. An attribute can be, for example, size, color, flavor, etc. If a shirt in the webshop is to be available in different colors and sizes, or a shake in different flavors, these attributes need to be created and then added to the product. Read on to see how to create attributes and connect them to your products.
TIP! Even if you forget to create attributes before you start adding products, it's great to create them in connection with the product. There is a plus sign there so you can access the same function as we describe below.
Go to Settings > Products > Product Attributes and click the plus sign in the right corner to create a new attribute.
NOTE! You only need to create the attribute once, if you have an attribute for size, this can be applied to all products and you choose which ones to link to which product. If more sizes are added later, you can easily edit the attribute and add them.
Create attributes:
- Click on the plus sign at the top right.
- Enter a name for the attribute, e.g. taste or size.
- Specify the order in which the attributes should be found on each product, i.e. what should be selected first, etc.
- Click the plus sign next to
Product Attribute Itemsto add variations, such as small, medium, large or vanilla and chocolate. - Click create.
Edit attributes:
- Click the pencil on the attribute to be edited.
- Click the plus sign next to
Product Attribute Itemsto add more. - You can easily change the order by dragging and dropping them if you click and hold your mouse over the dots on the left of each item row.
- Click save when you have made your changes.
The video below shows an example of how to create and edit an attribute.
Create a product with multiple variations
Go to Settings > Products > Products and click the plus sign in the right corner to create a new product.
If the product is to have multiple variations, activate it at the top by clicking the Product with variations button. In this article we only describe how to create multiple variants, if you want a walkthrough of all other fields and a product's basic settings, read the article "Create a product for sale in a checkout or webshop".
Create multiple product variants :
- Click on the plus sign in the top right corner under
Products. - Click the
Product with variationsbutton to activate the multiple variants feature. - Make all settings for names, descriptions, categories, etc.
- At the bottom of the page under
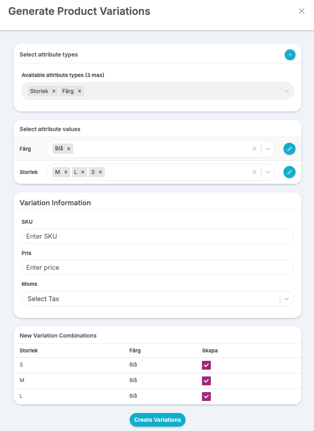
Product Variations, click the plus sign to attach attributes to this product. - Choose which attribute(s) this product should have, e.g. size and color (you can have a maximum of three attributes per product).
- Then choose which attribute values should be selectable for this product, a hoodie may not be available in blue, for example, but only in black and white, while a T-shirt is available in all colors, then you only choose the values that apply to this product (this can of course be corrected later if it changes).
- Enter SKU (article number), price and VAT. If it is to be different for different attributes, this can be skipped here and set in the next step.
- Review the summary at the bottom to make sure all attributes are correct. You can choose to uncheck specific ones if you don't want to create them now. This can also be done later.
- Click on
Create variations
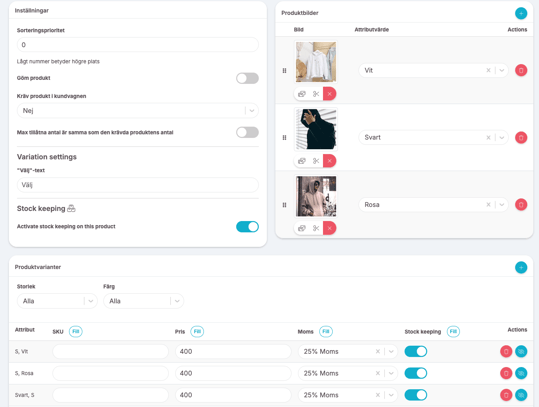
After the variations are created, you can enter the SKU, price and VAT on each row. If you want them all to be the same, you can simply enter the correct value on the top row and then click "Fill" and the value will be copied to all rows.
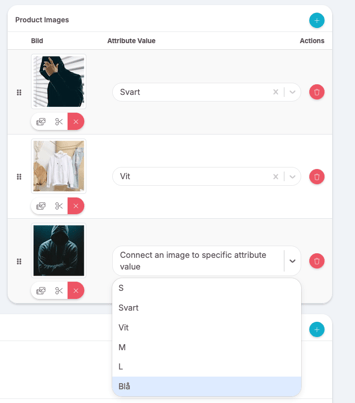
You can also specify a custom image for each attribute that will then be displayed in the webshop. Scroll up a bit to Product Images and click the plus sign to add one or more images. Then select the image and which attribute variation it should be linked to.
Everything we have gone through above is exemplified in the video below, please watch it for clear examples.
Related articles
Last updated: 30/6-2025