
Watch or read
- The video and this article show exactly the same things, in the same order.
- The video is in English. This article is also available in other languages. To read it in your language, choose it in the language menu at the top of the help center.
- Each part below shows where it starts in the video, so you can follow along in both.
You don’t need any earlier knowledge of Wondr. Looking at a profile doesn’t change anything.
In this article
- Find the user profiles
- The Users page
- Search and filter
- Add a new member
- Open a profile
- The top of the profile
- Send a message and more actions
- Memberships
- Orders
- Activity timeline
- Payment methods
- Notes and more
1. Find the user profiles
Video 0:00
When you log in, you start on your start page. To see the people at your facility, go to Users > Profiles in the menu on the left.
2. The Users page
Video 0:25
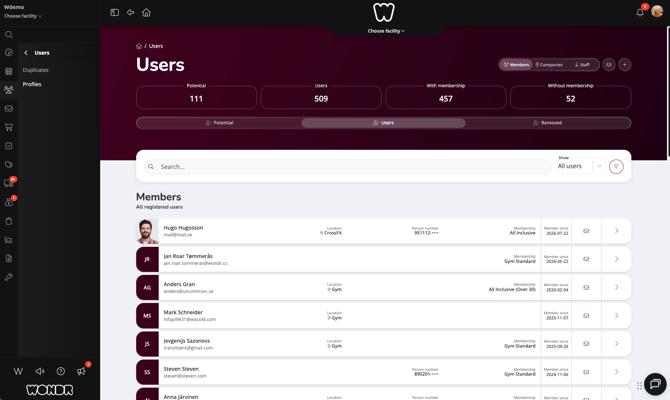
The Users page lists everyone who is registered at your facility. At the top, four numbers give you a quick overview: Potential, Users, With membership and Without membership.
Below the numbers, you can switch between three lists: Potential, Users and Removed. At the top right, you can also switch between Members, Companies and Staff.
Each row in the list shows the person’s name, email, location, membership and when they became a member.
3. Search and filter
Video 0:35
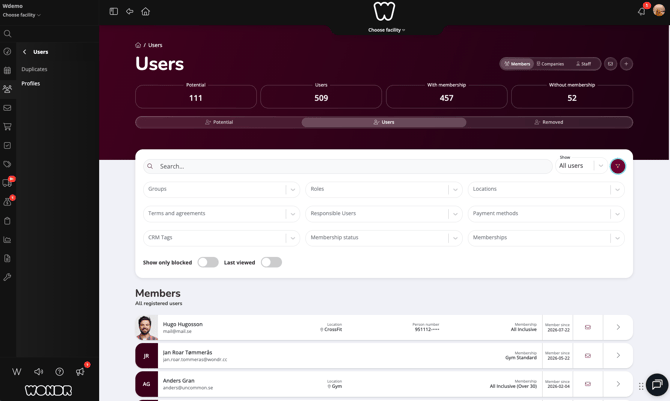
Type a name in the Search field to find a person quickly.
Click the filter button next to the search field to see more filters. For example, you can filter by Groups, Roles, Locations, Membership status or Memberships.
4. Add a new member
Video 0:45
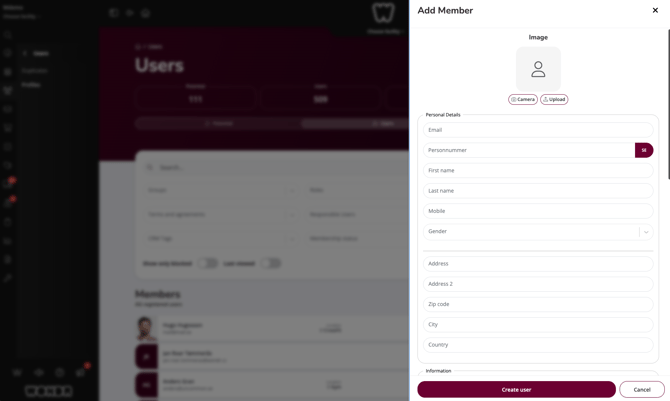
Click + at the top right to open the Add Member window. Here you fill in personal details, for example email, personal number, name, mobile number and address. You can also add a picture. Click Create user to save.
In the video, we only look at the window. No new member is created.
5. Open a profile
Video 0:55
Click a person in the list to open their profile. The profile collects everything about this person in one place.
6. The top of the profile
Video 1:00
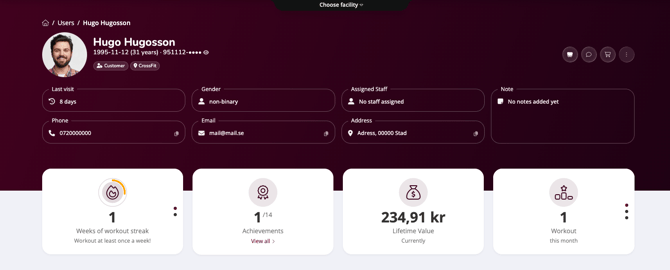
At the top, you see the person’s name, date of birth, age and personal number. Below that, you see contact details and other basic facts, for example Last visit, Phone, Email and Address. Assigned Staff shows if someone at your facility is responsible for this person.
The boxes below show the person’s activity, for example Weeks of workout streak, Achievements, Lifetime Value (how much the person has paid in total) and workouts this month.
7. Send a message and more actions
Video 1:05
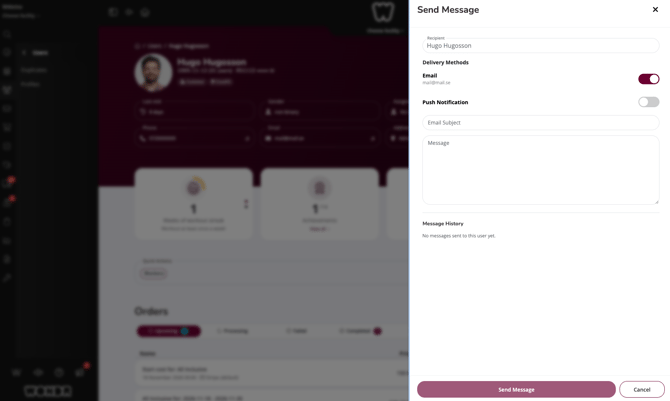
The buttons at the top right of the profile give you quick actions. The speech bubble opens Send Message. There you write a message and choose if it is sent as an email or a push notification. You also see earlier messages to this person under Message history.
The button with three dots opens a menu with more actions, for example Edit user, Log, Orders Summary, Export data and Block user.
TIP! To change the person’s details, choose Edit user in the three dots menu.
8. Memberships
Video 1:25
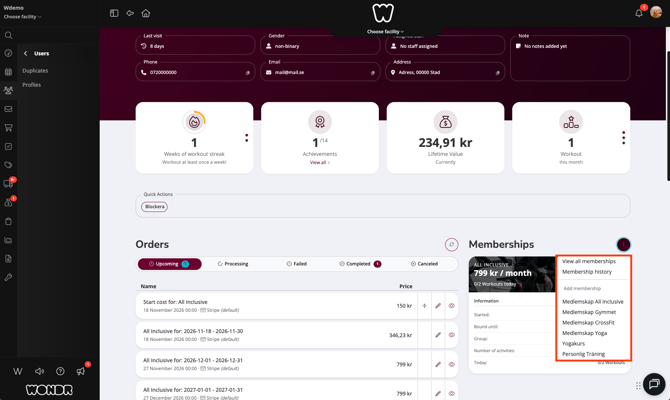
The Memberships box shows the person’s membership, its price and how often they have trained today, this week and this month. You also see when the membership started and how long it is bound.
The menu in the box lets you see all memberships, see the membership history or add a new membership.
9. Orders
Video 1:40
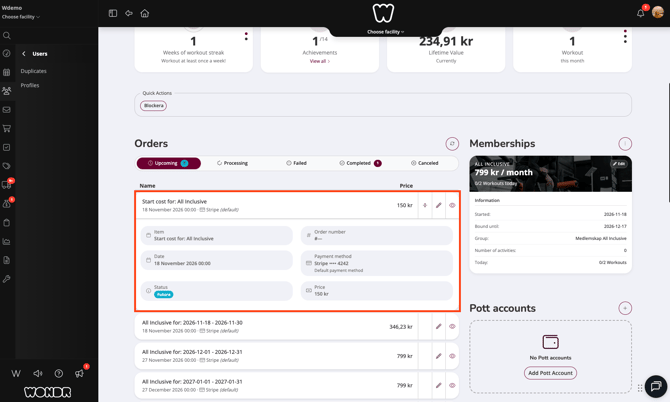
The Orders list shows the person’s payments. Use the tabs to see orders that are Upcoming, Processing, Failed, Completed or Canceled.
Click an order to see more details, for example the order number, payment method and status.
10. Activity timeline
Video 2:00
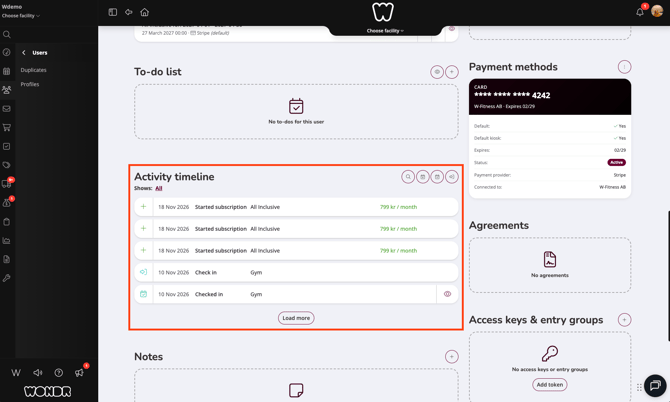
The Activity timeline shows what the person has done, for example check-ins at your facility, with the newest first. Click Load more to see older activities.
One of the buttons above the timeline opens Find activity. There you can find an activity and book it for this person.
Above the timeline, the To-do list shows tasks that are connected to this person.
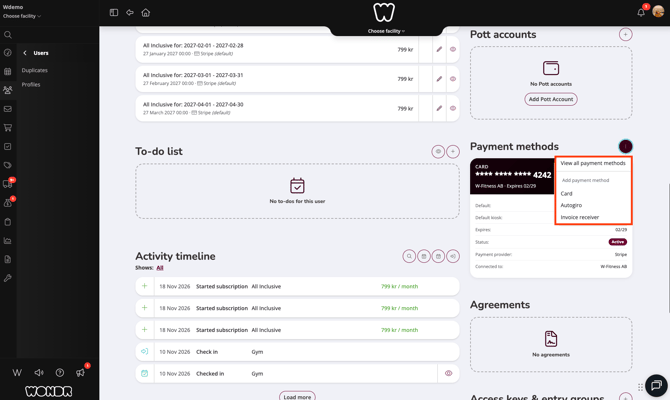
11. Payment methods
Video 2:10
The Payment methods box shows how the person pays, for example a card. You can see if it is the default payment method, when it expires and if it is active.
12. Notes and more
Video 2:20
Further down, there are more boxes. When a box is empty, it shows a button to add something.
Notes: write notes about the person. Click+to openAdd Note.AgreementsandFiles and documents: agreements and files that belong to the person.Access keys & entry groups: the person’s access to your facility.
NOTE: You only see the pages your role has access to. If you can’t find Users > Profiles, or some parts of a profile, ask an administrator at your facility.
Words you will see
User
A person who is registered at your facility.
Member
A user who has a membership.
Profile
The page with all information about one user.
Order
A payment the person has made or will make, for example a monthly fee.
Check-in
A record that shows the person came to your facility.
Push notification
A short message that shows on the person’s phone through the app.
What’s next?
- Sell a membership manually
The next video in the education series. Learn how to sell a membership, edit it and add a payment method manually.